
Standard mode can only see your most recent ~3,200 posts, because that's all X's timeline exposes. To delete further back, upload the data archive X provides — it lists every post you've ever made, so we can work from your complete history instead.
There are three stages, and we'll walk through each one below:
- Ask X for your data archive and download it once it's ready.
- Upload that archive (or just its post file) to X Deleter.
- Run a deletion as usual, choosing your uploaded file as the source.
Getting your archive from X
X keeps this option inside your account settings. Before you begin, double check that your email address and phone number on X are current — X often sends a verification code to one of them before it will build your archive.
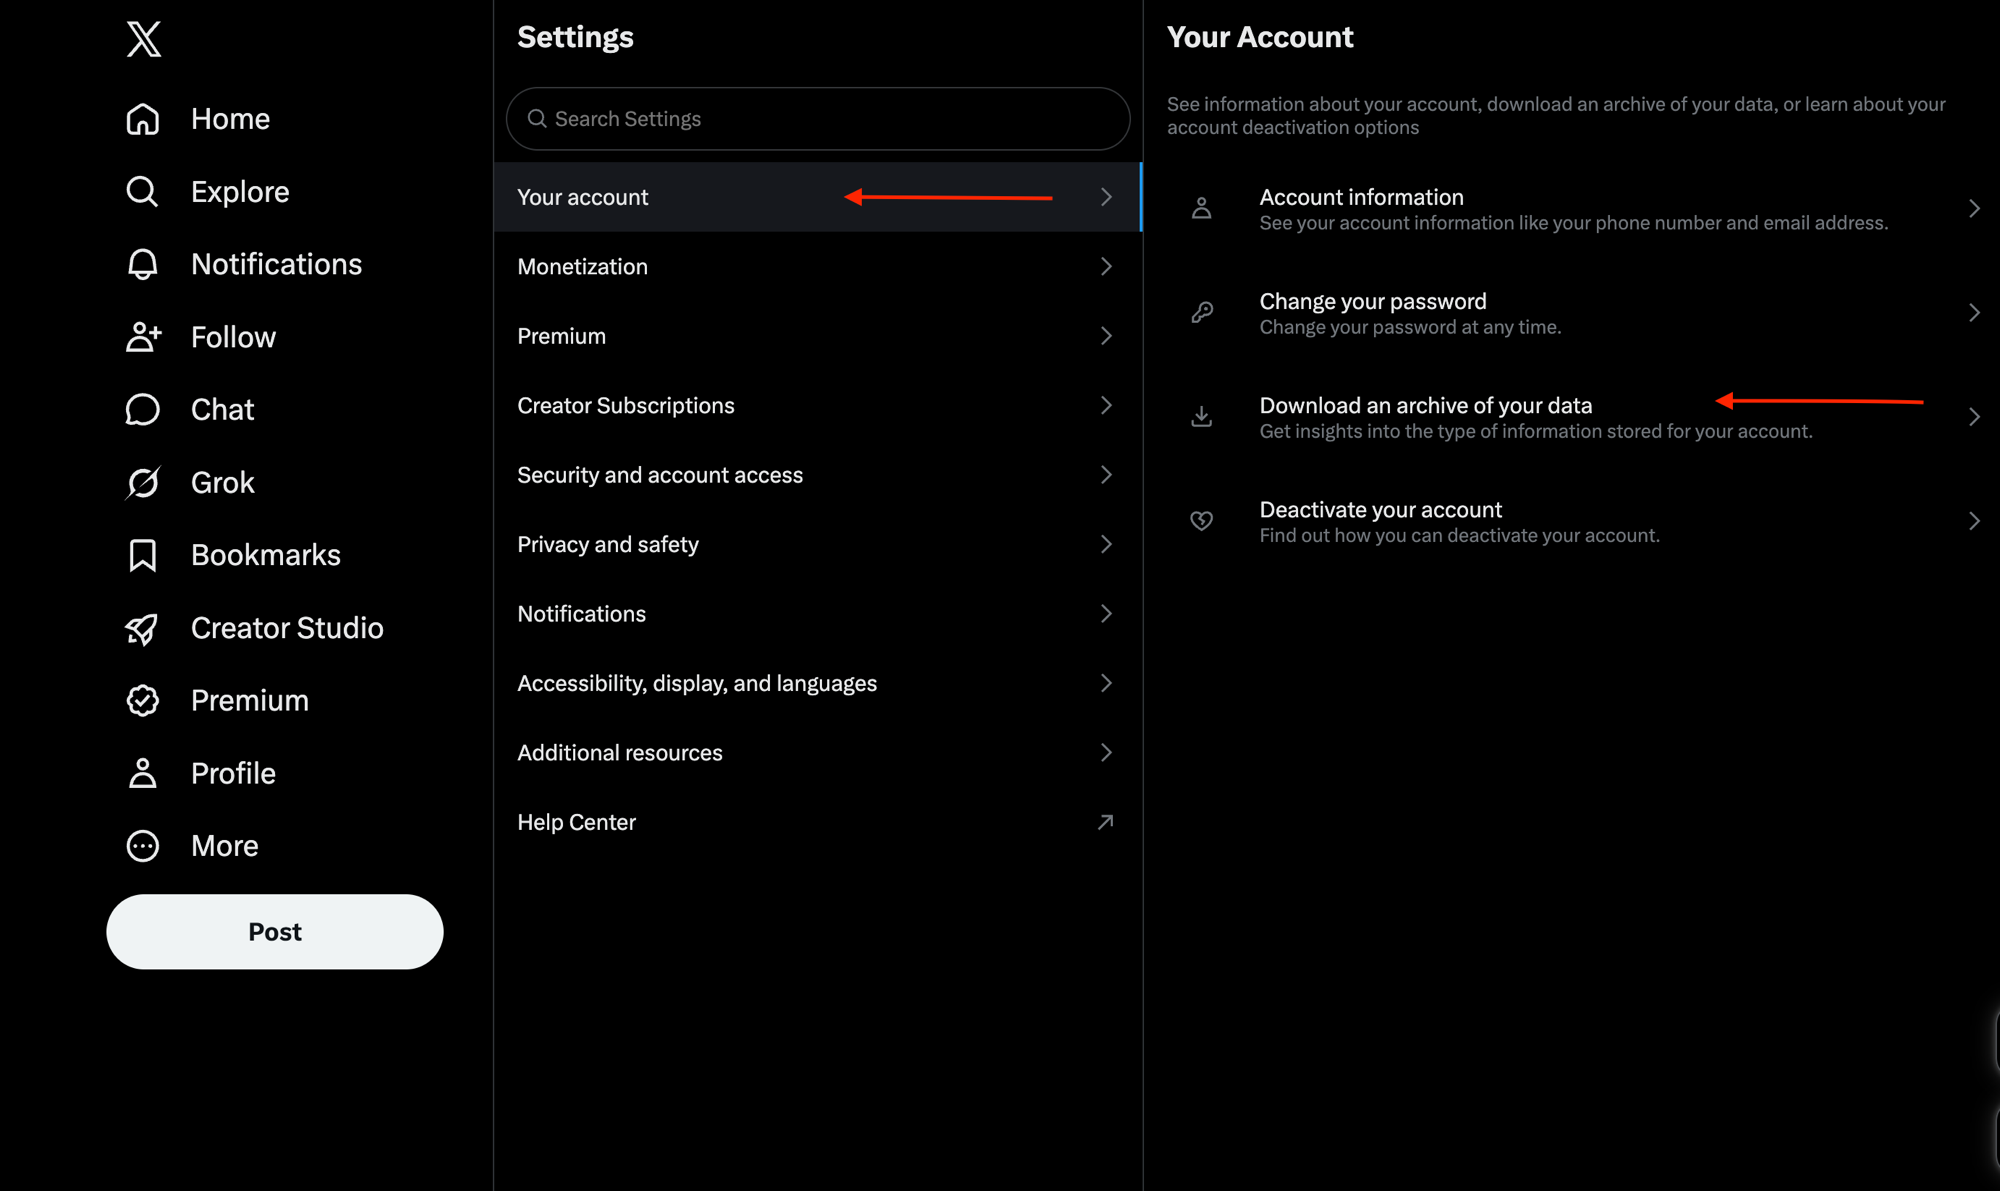
- Open Settings on X, then choose Your account.
- Select Download an archive of your data (see the highlighted items below).
- Confirm your password and complete any verification X asks for (this is usually a code sent to your email or phone).
- Press Request archive to start the process.
X usually takes around a day to put your archive together. When it's ready you'll get an email or in-app notification with a download link. These archives can be large — they bundle in every image and video you've posted — so it's worth downloading over Wi-Fi rather than mobile data.
Uploading it to X Deleter
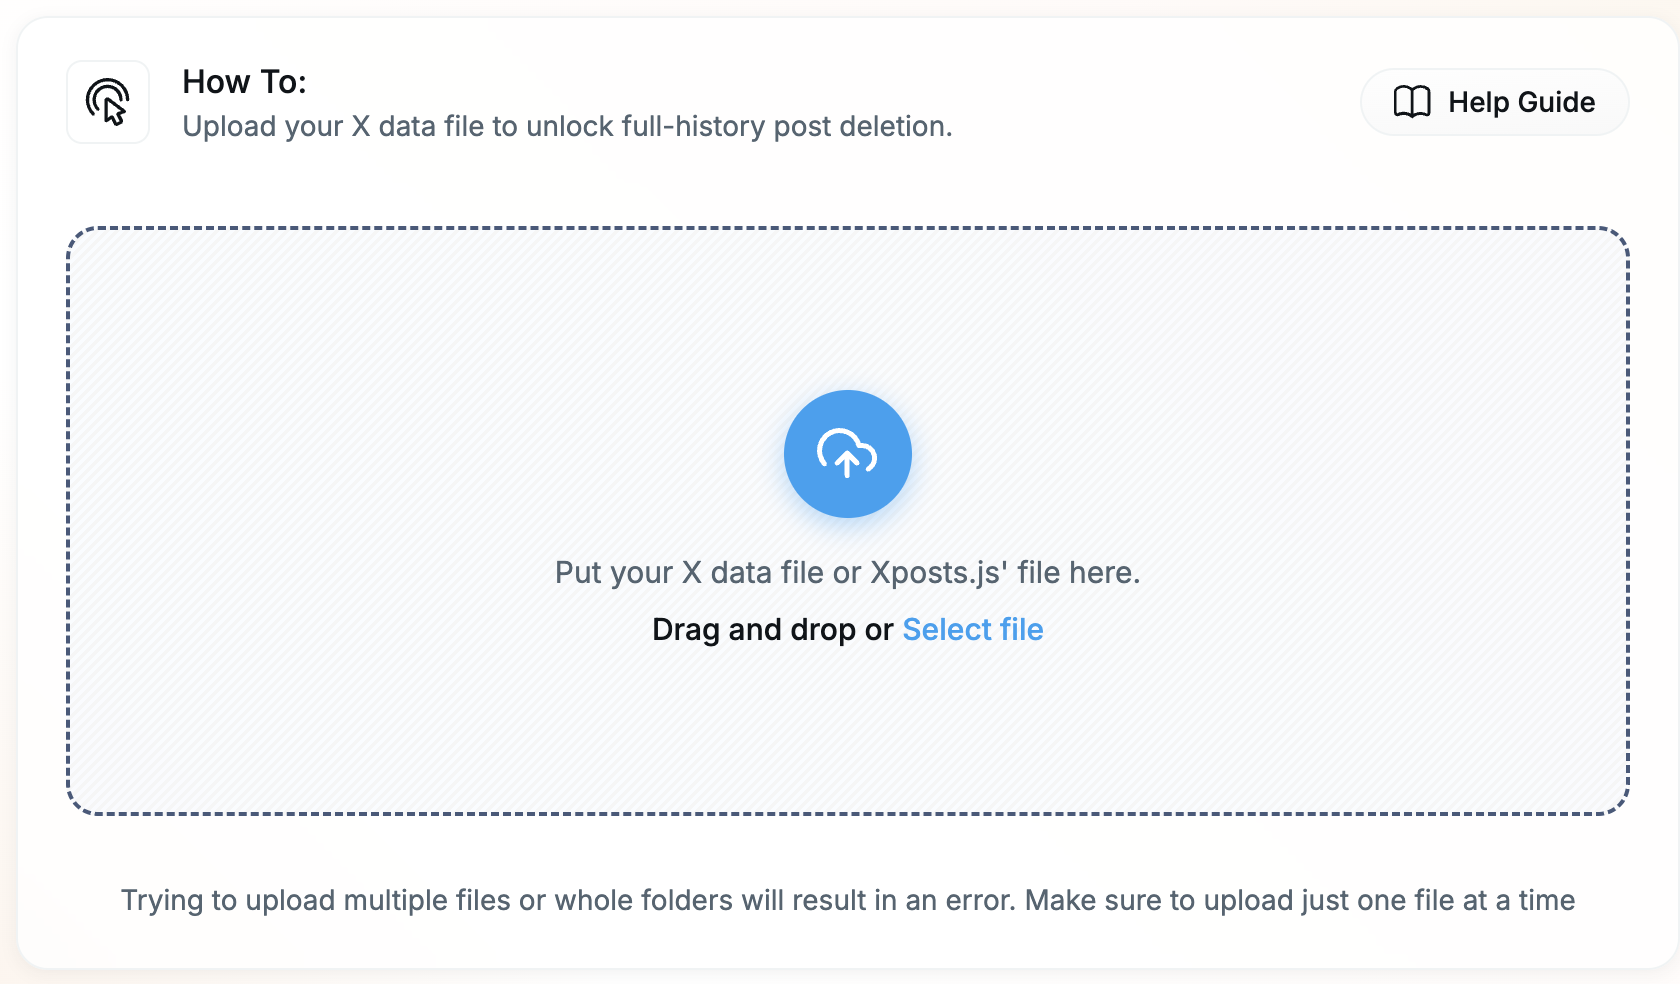
Head to the Upload page and either drag your file onto the drop zone or click it to browse for the file. Upload one file at a time — selecting several files or a whole folder will cause an error.
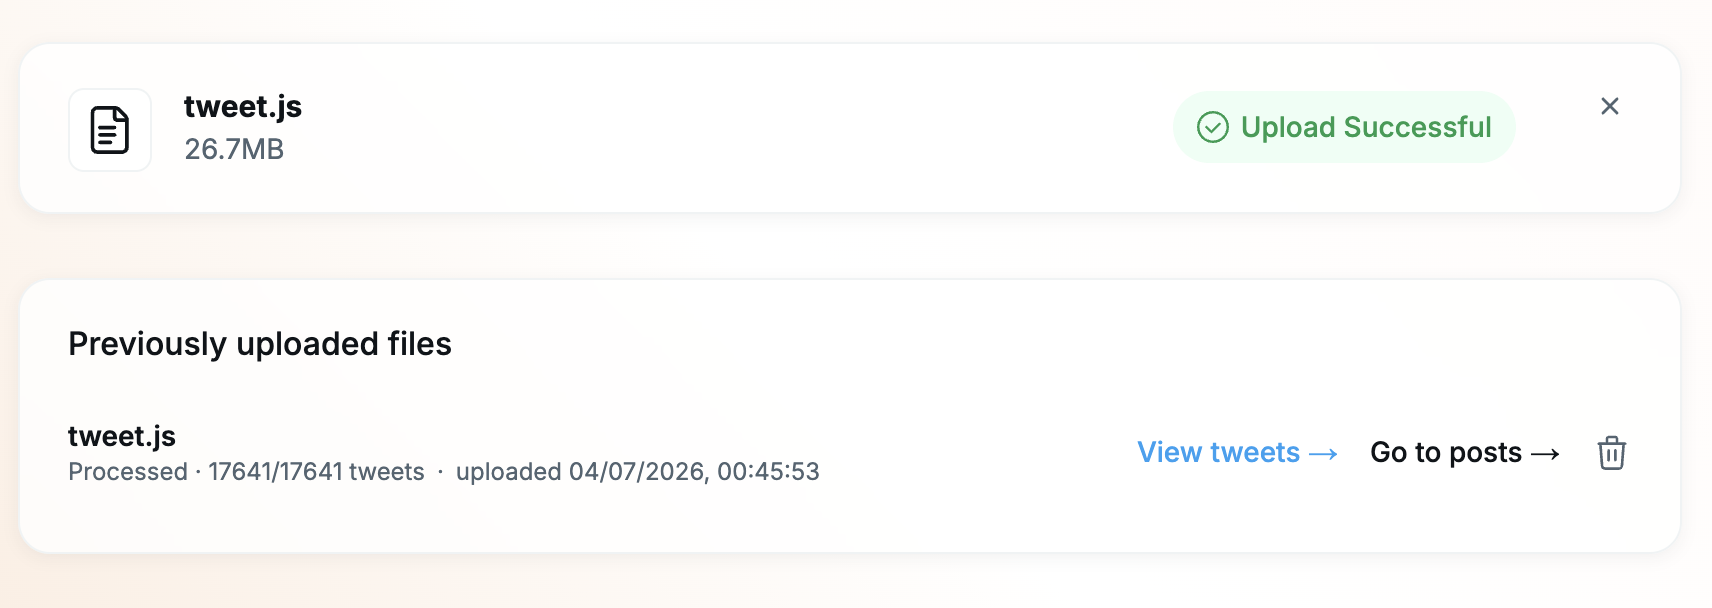
Once we've finished processing it, the file appears under Previously uploaded files showing how many posts it contained. From there you can use View tweets to browse everything in the file (handy for grabbing individual post IDs) or Go to posts to jump straight into a deletion.
Running the deletion
On the Posts page, open Search & Filter Posts. Set the age, type, and any keyword you want, then under Posts from file pick the archive you just uploaded. Apply the filters and the list will now be drawn from your uploaded history rather than just your recent posts.
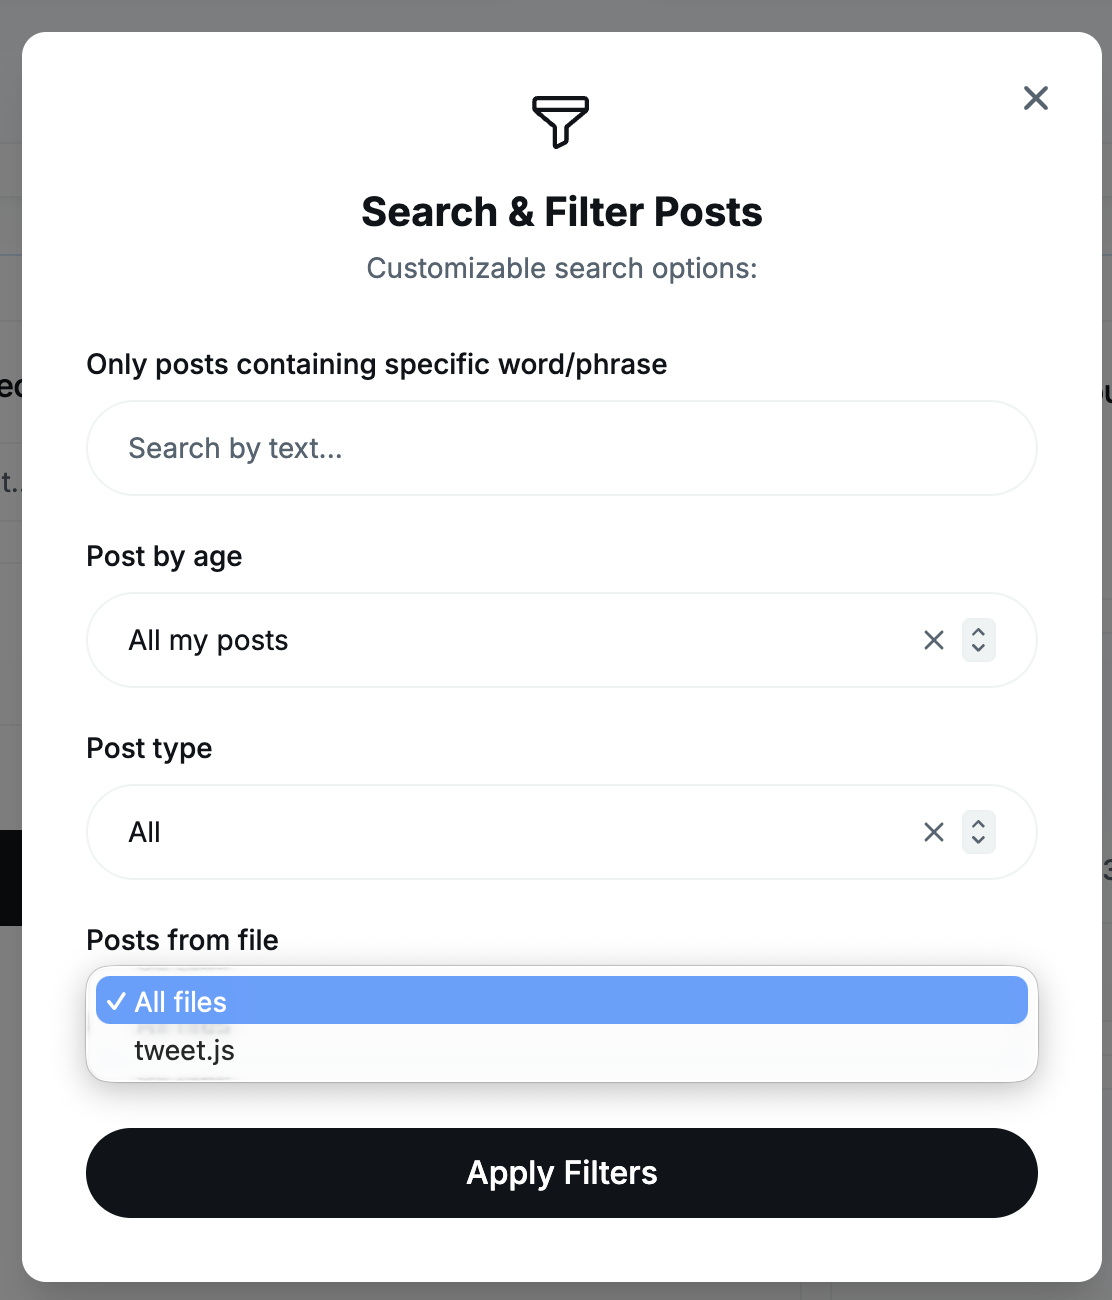
Please double-check your age, type and keyword settings before you confirm— because this mode can reach your entire history, it's capable of deleting a very large number of posts at once.
Good to know
- Use a recently downloaded archive. An old one won't reflect posts you've made (or removed) since it was generated.
- Even after clearing everything, your public post count on X may not drop to zero — certain reposts behave oddly. Our FAQ explains why.
- Large deletions take time (very roughly 15,000 posts an hour). You don't need to keep the tab open — the job keeps running, and you can check back on the Tasks page.
- X's own post counter can lag by a few hours after a big deletion before it catches up.
If your file is too large
The .zip from X packs in everything about your account, so it can exceed our 1GB upload limit. Almost none of that is needed here — the only part we use is a single file listing your posts, named tweets.js, inside the archive's data folder.
You can upload just that tweets.jsfile on its own and we'll read it exactly the same way. If you'd like screenshots of where to find it, see the large-file guide.
If you have 50,000+ posts
Very large histories are sometimes split across several files in the same folder — for example tweets-part1.js, tweets-part2.js and so on. You can upload each of these one at a time and run a separate deletion for each.
If you'd rather do it in one go, put all the tweets* files (keeping their original names) into a fresh .zip and upload that. A single upload of this kind can hold up to 400,000 posts; beyond that, split them across multiple runs.
If something goes wrong
- Check you're uploading the right thing — normally the .zip straight from X (if it's under 1GB), or the tweets.js file described above.
- Odd upload errors are often browser-related — an outdated browser, or an extension/content blocker interfering with the page. Trying another browser or device usually clears it up.
- If the full .zip won't upload, try just the tweets.jsfile instead — it's much smaller and more reliable on a shaky connection.
- On macOS, the built-in Archive Utility can't open .zip files over 4GB — for those, use a tool like "The Unarchiver" instead.
Still stuck? Reach out from our Contact page with the details and we'll help you find a way through.